Deploy to Sherpa.sh
Learn how to deploy your apps to Sherpa.sh.
Introduction
Sherpa.sh provides NextJS hosting solution that's 80% more affordable than Vercel and Netlify. Sherpa.sh provides a powerful, cost-effective alternative.
Sherpa.sh is an official partner of NextJet. This bootstrapped company was founded by developers who understand the challenges of scaling SaaS applications, and the founder is actively available in the NextJet Discord channel to provide personalized support. Just message zach @ sherpa.sh.
Video Tutorial
Below you will find a video tutorial that will guide you through the process of deploying the Nextjet Next.js SaaS boilerplate to sherpa.sh. You can also skip ahead and follow the written steps below.
Text Tutorial
Getting Started with Sherpa.sh
- Visit Sherpa.sh and click "Sign up for free"
- Link the github account/organization that contains your Nextjet project repo.
- Import your Nextjet project repo.
Deploying the Marketing Site
Configure Build Settings
Be sure to enter the project settings exactly. They are crucial for the project to deploy correctly.
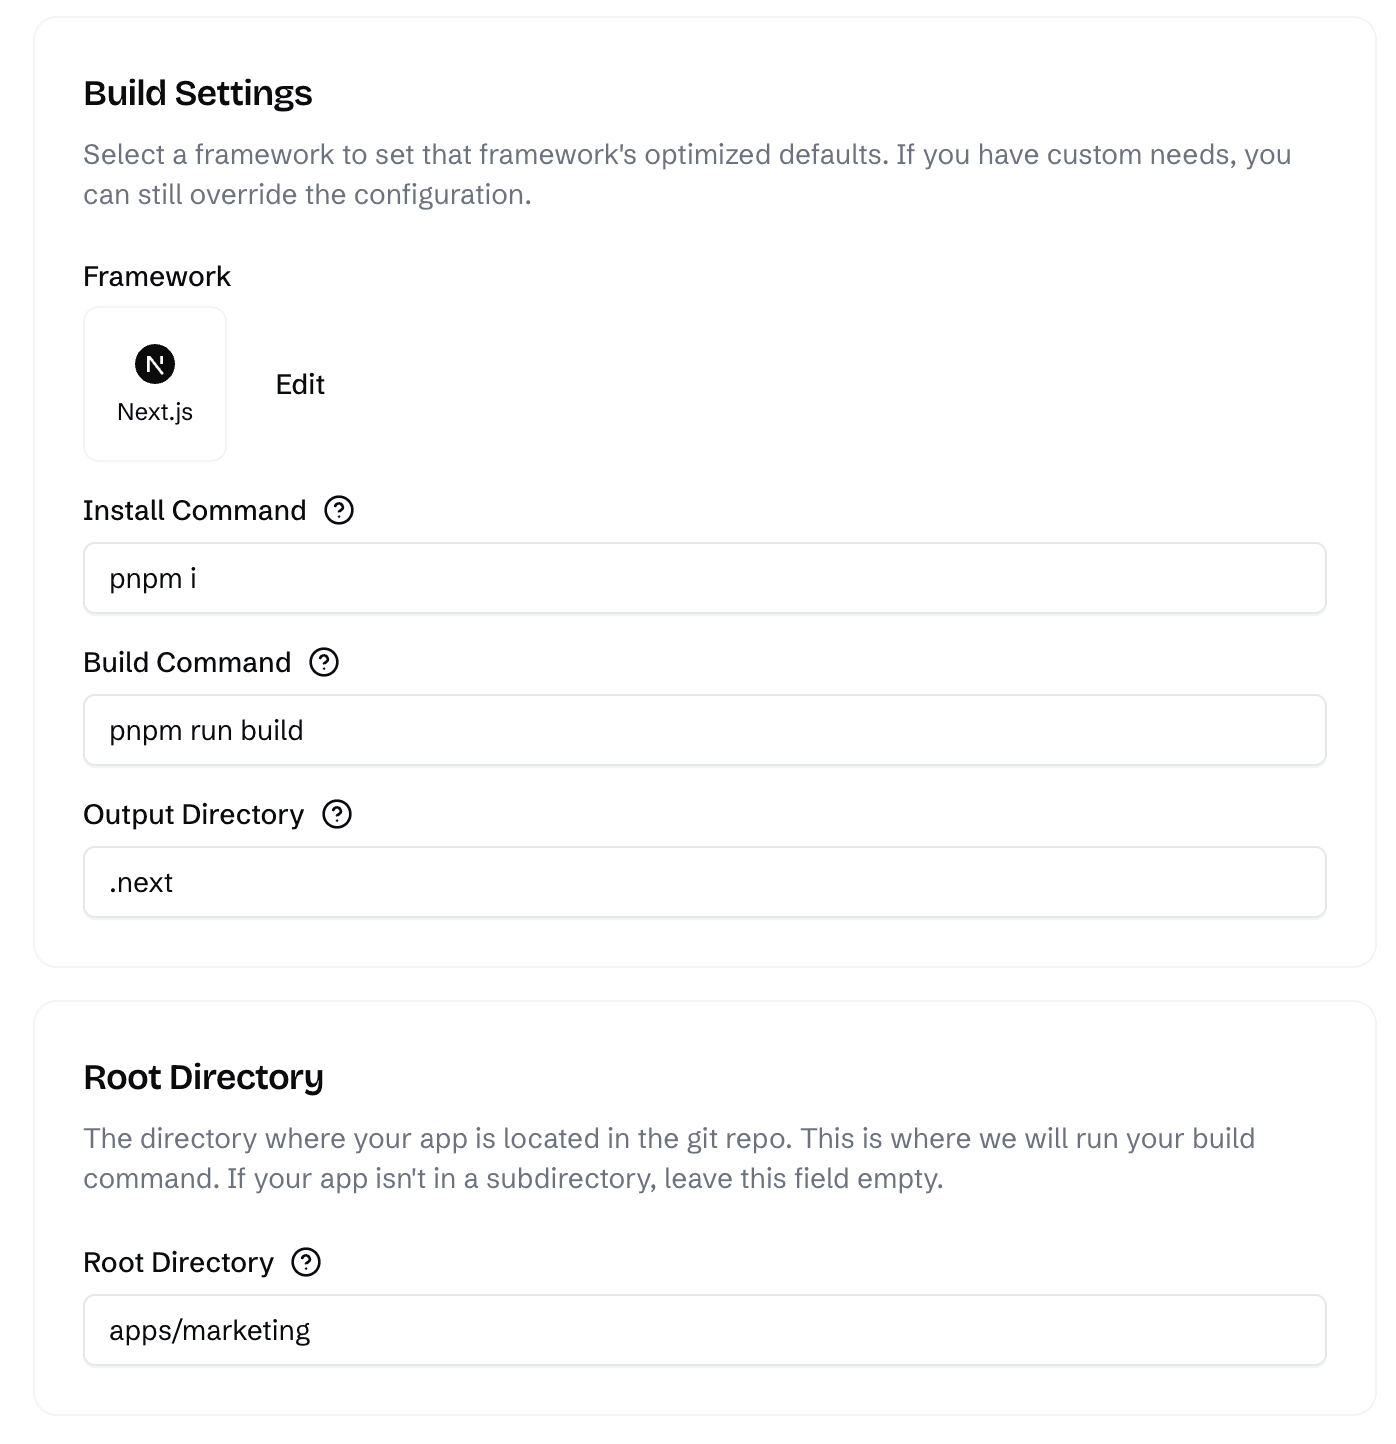
As you can see in the image, please make sure to:
- use Next.js as the framework preset
- use pnpm for the install and build commands
- keep the default output directory
.next - set the root directory to
apps/marketing
Configure Environment Variables
Add the following environment variables:
Deploy
Click Save & Deploy and wait for the build to complete. You will be able to see the live site by clicking View Live.
Custom Domains
To add custom domains follow the documentation here.
Deploying the Dashboard Site
Configure Build Settings
Be sure to enter the project settings exactly. They are crucial for the project to deploy correctly.
Just like the marketing site, please make sure to:
- use Next.js as the framework preset
- use pnpm for the install and build commands
- keep the default output directory
.next - set the root directory to
apps/dashboard(this is the only build setting that is different from the marketing site)
Configure Environment Variables
Add the following environment variables:
Deploy
Click Save & Deploy and wait for the build to complete. You will be able to see the live site by clicking View Live.
Custom Domains
To add custom domains follow the documentation here.
Continuous Deployment
One of the best features of Sherpa.sh is automatic continuous deployment:
- Every push to your main branch will trigger a new build and deployment
- Pull requests automatically create staging environments for testing
- Database schema migrations can be handled through GitHub Actions workflows
- Zero-downtime deployments ensure your users never experience interruptions
You can read more about sherpa.sh app hosting on their website.
Community Support
As a bootstrapped company built by developers for developers, Sherpa.sh provides exceptional community support. The founder is actively involved in the NextJet Discord channel, where you can ask questions, get personalized help, and connect with other NextJet users.
This direct access to the founder and the Sherpa.sh team ensures you'll never be stuck during deployment, and you'll always have expert guidance available when needed.
Last updated on